Saturday, November 26, 2011

Almond Cookies

I love this Almond Cookies very much....

I remembered I used to buy many tins of almond cookies as I love these Almond Cookies very much. Even my hubby loves these cookies as well.:-D


ALMOND COOKIES


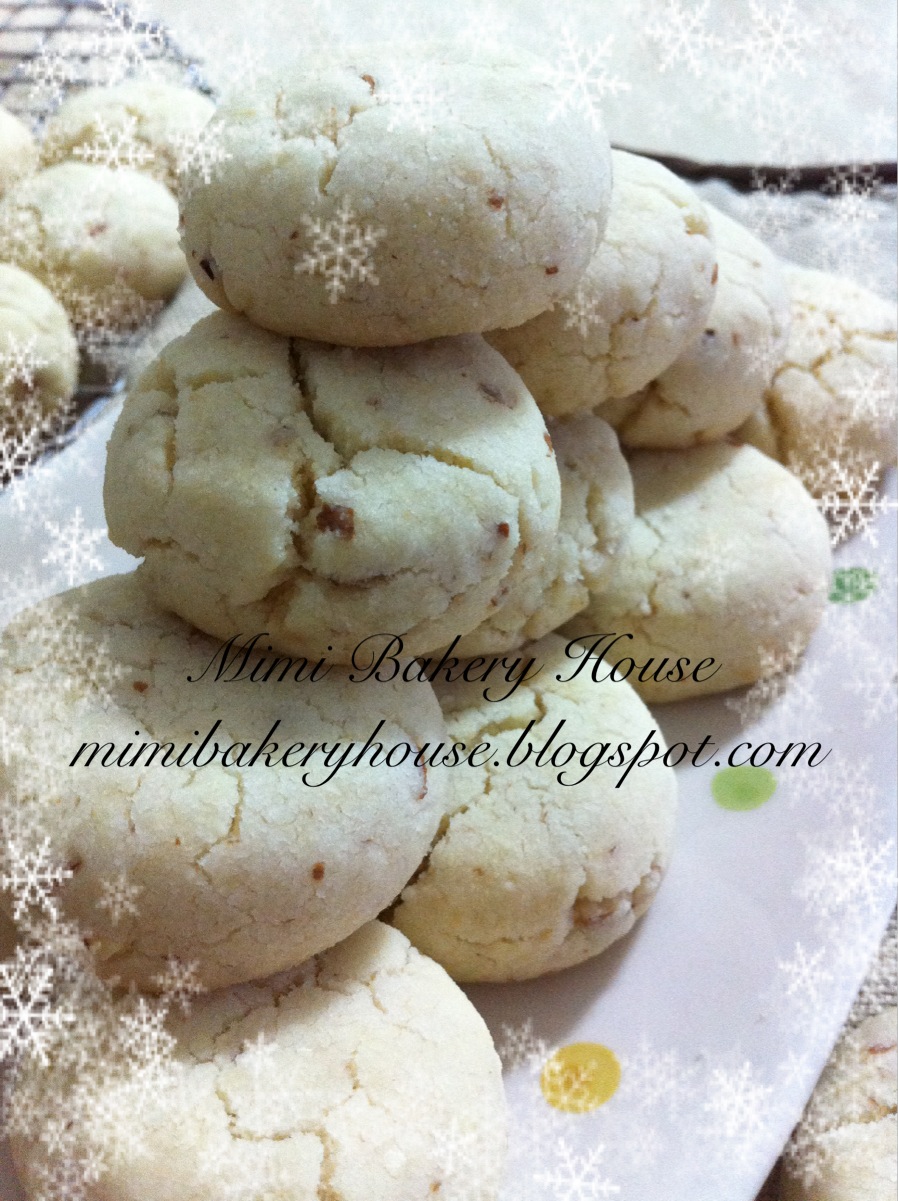
These almond cookies are bite-sized.... It did not smell that fantastic when I was preparing the dough.
But when they were out of the oven, you can smell the almond aroma... ahhhhh, that's what I wanted... I really can't wait for the cookies to cool down.... And I just had to try one first....

Really goooooooody!!!! It is really fantastic!!!

I love these cookies sooooooo much!

All packed in the containers now....

Really to be sampled by my colleagues & friends:))

I will update this post with the recipe soon:)

Friday, November 25, 2011

Almond Butter Cupcake

How about having a Almond Butter Cake in a Cup?

These Almond Butter Cupcakes are really very easy to make.


They are even great as a loaf of cake...

The butter is really soft, taste yummy too. My girlfriend's baby likes it very much. But I feel it is a little bit too oily. :-p


Other than that, the texture was great!!
I will update this post with the recipe soon:)

What have I been up to this Weekend???

Ta-da... This is what I had been up to last weekend... For a change, I decided to make Ngoh Hiang on Saturday. You might probably find this dish a weird one in my blog as I hardly cook.... hahahaha!!!


FRIED NGOH HIANG


I had been wanting to make Ngoh Hiang for a very long time. I remembered the last time I wanted to make, I bought the "skin", but the "skin" ended up wrinkled up in the fridge as I had left it there for a sper long time... Until last Friday, I was chatiing with my friend and she told me she made "mei cai kou rou". So then we talked about the ngoh hiang, that when I decided to try it out... hehehehe!!!
I bought 1/2 kg of lean minced meat and 1kg of prawns from the wet market. I haven't had enuogh money so I only bought 1/2kg of meat:-p. As you can see from the cut ngoh hiang, you can see more prawns in it...

With the 1/2kg of meat and about 3/4kg of the prawns, mixed with minced chestnuts, spring onions, I made about 8 big rolls & 2 mini rolls.

The Ngoh Hiang are ready... I fried the mini ones, and I had to try one, so one of the mini was eatedn by me... Hubby came out of the room, and said the smell of ngoh hiang made him drooled... So he ate 1 big roll and the other mini roll...:-D


It was really delicious..... But it will be better to use the normal minced meat instead of the lean minced meat as the lean meat is slightly drier... With a little fats, it will make the ngoh hiang even more juicy:))


Oh, of course, our dessert.... Mango Pudding....


Eeeermm, I did not made this though... It was a premix mango pudding I bought from Phoon Huat... hehehehe....


Yummy too, additional fresh mangoes added..!!!


Thursday, November 24, 2011

Doremon Cookies

How about eating Doremon????

This is not a cake nor a soft toy... It is a Doremon Cookie!!!

Cute isn't it???


DOREMON COOKIES

My friend had invited my family & I for a lunch on Saturday. She said she will be bringing her god-daughter along. I know that her god-daughter loves Doremon very much. So I decided to make these cookies for her. These cookies simply takes up too much time & effort. By the time I finished half a tray of the cookies, my back was almost broken!!!


But the effort was well paid off.

My friend's god-daughter likes them. My girlfriend , her hubby & her kids like it too.

My kids???

They LOVE them too.... They finished almost the balance ones. I quickly packed some up for my colleagues before they were all gone... hehehehe....


I will update this post with the recipe soon:-D

Wednesday, November 23, 2011

大理石磅蛋糕 Marble Pound Cake

我想了很久,不知道我是佛用中文来写这个大理石磅蛋糕的材料。我的中文一向来都是很糟搞。你们可能在这几句华文字当中,已经发现了很多错误。。哈哈哈哈!!没办法!你们就将就一点吧。忍一下我的超级兰的中文!!


大理石磅蛋糕


那时,我的同事到台湾游玩,我拜托她帮我卖胡涓涓,Carol,的食谱。

1。烘焙新手第一本书

2。面点新手第一本书


其实我已经翻了她的食谱很多次了,就是不知道该尝试哪一页。。。

所以我昨天晚上决定尝试胡涓涓的其中的烹调方法。

情况如和呢???

还不错。。。不过我觉得烹调方法由点麻烦。。也可能是应为我的华文实力实在差经了。:-p

味道呢?老公式了一片,他说蛋糕还不错。大姐也式了一片,她也说很好吃。
这个大理石磅蛋糕底却不错。
口感很柔,很香。

MiMi 也忙着式吃。根本就没空理我。哈哈!!


等我有空的时候,我才居续写大理石磅蛋糕的材料了。


我已经用了大半天的早上,就子能写这么多了。哈哈哈哈哈!!

Tuesday, November 22, 2011

Black Sesame Chiffon Cake

I have been wanting to try to bake a black sesame chiffon cake for quite sometime. But it just did not happen, until recently, I bought a packet of black sesame powder from Shop & Save.

In my previous few posts, I had tried making the black sesame panna cotta, which was yummy as well...


BLACK SESAME CHIFFON CAKE


I had seen a few food bloggers whom had already made these black sesame chiffon. The recent one was from Small Small Baker. So I decided to try out her recipe.

These black sesame chiffons look great isn't it? i was very pleased with the outcome:))
I simply love the texture of these chiffon!! They are really fantastic...!!! It has the spongey feel, and of course, with the black sesame flavor, it was simply heaven!!!
Hubby and some of my friends preferred more of the black sesame taste, as they said the black sesame is abit mild. But as SSB had mentioned, using the black sesame paste will make the chiffon more fragrant. Next time perhaps:))


Ingredients:

(makes one 17cm chiffon tin + 2 x 3" mini chiffon)

with slight modifications

4 egg yolks

40g sugar

50ml vegetable oil

80ml water

100g cake flour

75g black sesame powder

1 tsp baking powder


5 egg whites

50g sugar

1/4 tsp cream of tartar


Method:

1. Whisk egg yolks and sugar until the sugar dissolves.

2. Gradually add in vegetable oil, followed by water.

3. Fold in black sesame powder, sifted cake flour and baking powder until well-mixed. Set aside.

4. In another bowl, whisk egg whites and cream of tartar until foamy. Add in sugar gradually until stiff peak form.

5. Gently fold in the egg white into the egg yolk batter in 3 batches.

6. Pour the batter into an ungreased chiffon tin.

7. Bake in preheated oven at 190 deg C for 40-45 minutes.(my own oven heat)

8. Remove from oven and invert the tin immediately onto a cooling rack.

9. Unmould the cake only when it is completely cool

Sunday, November 20, 2011

Too Early for a Christmas Log Cake??? - Vanilla Blueberry Log cake

Perhaps not too early...??? I have already seen some places that hadstarted their sale of christmas log cakes and those christmas cupcakes... Such a cutie.... So why not let me try a log cake myself.... I have yet to try out if I can do one...


I have actually bought those christmas decorations from Phoon Huat a couple of weeks back... Finally today I can put them in good use... hehehehe....


VANILLA BLUEBERRY CHRISTMAS LOG CAKE


I have read some recipe books that the christmas log cake is actually done with a swiss roll, topped with either chocolate or cream topping... So I had tried using my own swiss roll and coated it with chocolate ganache.

Nic had requested a vanilla swiss roll with blueberry fillings. The swiss roll was abit spongey and soft, plus with the blueberry filling, it makes it abit flimsy to handle the roll. As the blueberry filling will oozed out when it was been cut. I had to be extremely careful of not breaking the swiss roll and oozing out too much of the blueberry filling... hahahaha...!!!

And of course, finally the roll had been done up nicely... :-D


We tried the christmas log cake the next day....

At least the blueberry filling had settled into the swiss roll and it wasn't that "oozy" as compare to the day before when it was being spread onto the roll....

A weird combination of the swiss roll with the christmas log cake isn't it?


How did it taste like????


Well, not too bad... If you had bought those commercial log cakes and tried them before, I think, self make-cum-bake is still the best!!! This log cake, no doubt of the weird combination, it is rather refreshing because of the blueberry filling. It wasn't too sweet, and the roll was rather soft & spongey... Outside christmas log cakes are usually abit hard and too sweet..., whereas mine isn't... hehehehe....

Thursday, November 17, 2011

Black Sesame Panna Cotta

If you are a black sesame lover, this will suits you fine:-D

It tasted quite like the black sesame paste dessert, yummy!!!


Not only are they yummy, they are very easy to make as well:))
Ingredients:
2 cups whipping cup (about 500ml)
1/2 cup milk (125ml)
2 tbsp black sesame powder
2 tbsp castor sugar
2 tsp gelatine

Method:
Mix all ingredients and boil under low heat, until gelatine has dissolved.
Leave aside to cool, pour into small cups and refridgerate before serving.

Holiday Baking Sessions for Kids/Parents (Only Sat & Sun)

Does your little one wants to learn how to bake or decorate a cake?

Mimi Bakery House will be conducting a small baking session for the kids during the school hoildays.
We will be charging a minimal fee that will includes the recipe, ingredients & of course the cake:)

We can only accomodate 2-3 children per session.

19th Nov Closed
2oth Nov Morning Slot Taken
26th Nov Closed
27th Nov Afternoon Available
03rd Dec Afternoon Available
04th Dec Available
10th Dec Afternoon Available
11th Dec Afternoon Available
17th Dec Afternoon Available
18th Dec Available
24th Dec Closed
25th Dec Closed
31st Dec Closed

For those of you who are keen, you may wish to email me at mimibakeryhouse@gmail.com for more information.

For mummies who are keen to learn, you are most welcome to join in.:)

Soft & Fluffy Japanese Cheesecake 2

Updated 23 Nov 2011 for the recipe


Boy, I just love Japanese Cheesecake.


I found this Japanese Cheesecake recipe from one of my baking book for a couple of weeks, but I had yet to try it till recently... No regrets for it! It is simply fantastic!!!


JAPANESE CHEESECAKE


This recipe, unlike from the first Japanese Cheesecake recipe from SSB, is much easier.

No mess No fuss & Easy!!!


Here is the baked cheesecake.

I used a 6" square tin to bake it.

Texture of the cheesecake....??? GREAT!!!! It is soft & moist, just like my first Japanese Cheesecake that I had tried.


Ingredients:

100g cream cheese, soften

60ml whipping cream

2 egg yolks

60g sugar

2 tbsp flour

1 1/2 tbsp cornstarch

1/4 tsp cream of tar tar

3 egg whites


Method:

1. Beat cream cheese until smooth. Add in whipping cream and mix well.

2. Add in 30g of the sugar portion and beat well. Add in the egg yolk one at a time, beat well after each addition.

3. Fold in the sieved flour and cornstarch. Mix well.

4. In another bowl, beat egg whites & cream of tar tar until foamy. Slowly pour in the remaining 30g sugar until stiff peaks.

5. Fold in 1/3 of the egg white merringue into the egg batter. Fold gently to mix well. Repeat with the remaining merringue.

6. Pour batter into a cake tin lined with baking paper.

7. Water-Bake the batter in a preheated oven of 180 degC for 20mins, bring down to 150 decC for 15mins. Leave the cheesecake in the oven for 10 mins to let it cool down slowly.

Tuesday, November 15, 2011

Nic's Tea Party in School - Chocolate Names Cupcakes & Strawberry Fantasy Cake

Today is Nic's Tea Party in school for the Kindergarten 2 children. It is a pot-luck tea party. So all the parents will be preparing different food for the children. I decided to make some cupcakes and a cake for the teachers and children.


Chocolate Names Cupcakes


These chocolate cupcakes was prepared on Monday evening, and I just pipe the names on the cupcakes yesterday night. I think they all looked so pretty. I heard from my girlfriend that the children were very excited about these cupcakes as they had their names on it. Even Nat, I had made one for her, and she quickly finished her cupcake while I was preparing the cake. She too, was very excited about the name cupcakes... hahaha... These chocolate cupcakes are my girls' favourite, and mine as well!!! Even my girlfriend and her children loves it as well!!!
For the names, instead of using buttercream, I used whipped cream and mixed with strawberry paste for the girls' names and pandan paste for the boys' names.

These cupcakes simply looked so pretty... :-D

Ingredients:

55g unsalted butter

55g castor sugar

1 egg

55g self raising flour

2 tbsps cocoa powder

1 tbsp milk


Method:

Cream the butter & sugar until smooth & creamy. Add in the egg, mix well.

Add in the sieved flour & cocoa powder, fold in & mix well, followed by the milk.


Besides the cupcakes, I had also make a strawberry cake for the teachers and the children to share.


Strawberry Fantasy Cake

I had to make the cake after I got back from office... Well, it is always the Murphy's Law... Some hiccups here and there while I was baking the cake last night. I think I had over beat the egg yolks batter, plus using the black round cake mould, my cake sunk and it was burnt on the bottom...:-p

So end up, I re-do another strwberry sponge cake, using the normal square tin mould. It turns out alright, but still, I wasn't satisfied with the sponge cake... Murphy's Law indeed!

This is simply an ALL STRAWBERRY CAKE...


1. Strawberry Sponge Cake

2. Strawberry Whipped Cream

3. Sandwiched with 2 layers of Fresh Strawberries

4. Topped with Fresh Strawberries


SIMPLY A STRAWBERRY CAKE!!!

hahahaha.....

The cake smells so yummy, wish I could try the cake too... :-D


I hope my effort for the time spent on this Strawberry Fantasy Cake had gone in vain, and hope that they had all finished the cake.

Monday, November 14, 2011

Hello Kitty Cake - Having fun with the Decorations:))

Ain't this Hello Kitty Cake CUTE???? 1 day, I just suddenly have a thought that I should make a Hello Kitty Cake. Because I remembered that I had bought a Hello Kitty tin mould some time back, and I did not use it at all... So here we have, the Hello Kitty Cake!!!!


This is actually the 2nd Hello Kitty Cake I made. It is much nicer & "prettier" than the 1st one... hahahaha....

In the picture below, you can see my HK tin mould, the HK sponge cake, and my 1st HK cake.

We realized that without the outline for the eyes, nose, whiskers & ribbon, it will looked even cuter & neater. :-p

Both girls can't wait to try the cake, no doubt it is jus plain strawberry sponge cake & cream... So they took a picture with the HK cake before the cutting ceremony....

Then, the HK cake was left half, eaten & tested by the 3 testers... hahahaha!!!
The HK cake was gone by next morning...

And here, 2 cakes below, decorated by Nic,

And this one, by Nat.
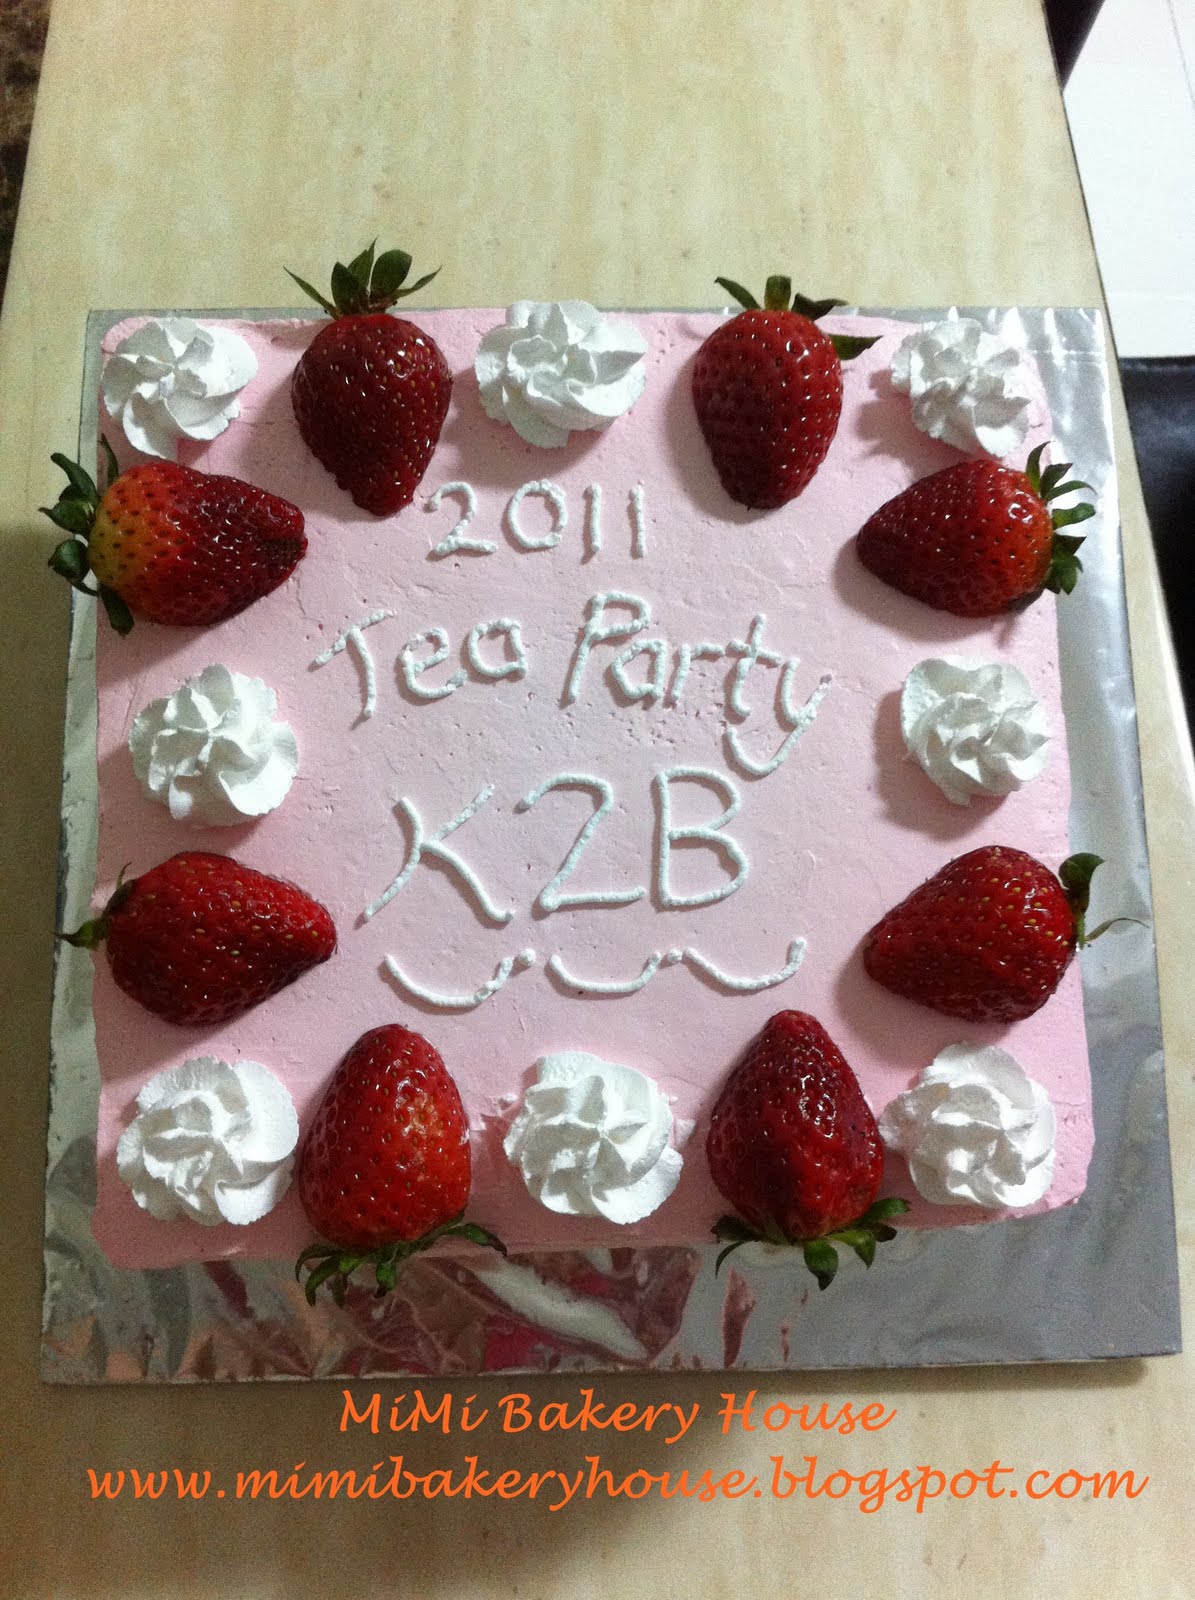
Guess, we all had fun with the cakes & cream!!! Yipee!!!