Saturday, June 30, 2012

Simply Scones - 2 different recipes

I love scones very much...
 The scones go very well with butter, jam or cream cheese.. yummy...

After the 3rd attempt from the Bake-Along, I was very keen to try another recipe. So being aunty again, I was browsing a "Yum Yum" magazine in the supermarket... Flipping through the pages, I came across a raisin scone recipe and again, I snapped shot the recipe instead of buying it...:-p
I had used self raising flour instead of flour+baking powder, that perhaps my scones did not really rise that much. It kinda look like "pong piah"??? hehehehe...
As the scone recipe had milk powder in them, it tasted very "milky". But spreading the scones with butter & jam, did covered away the milky taste.
Ingredients adapted from Yum Yum magazine:
(A)
250g lain flour
15g baking powder
50g caster sugar
100g milk powder(can used lesser if you do not like the milky taste)
1g salt

(B)
120g butter
60g raisins(omitted)
100ml milk

Method:
1. Preheat oven to 180C.
2. Put ingredients A into a mixing bowl, add in butter and rub with fingertips till you get a fine breadcrumbs texture.
3. Add raisins, milk & mix lightly until well-combined. Do not over knead the dough.
4. Roll out the dough into 2.5-3cm thick and cut into a 2" round dough. Brush with beaten egg.
5. Bake in the preheated oven for about 15-20 mins.


I had also tried Lena's scone recipe from her recent bake... Her scones did tempted me so much... Unfortunately, I wasn't able to get a nicely baked color like Lena's....
 Well, at least now I am getting some decent looking scones from Lena's recipe... This time, I had made it about 3cm thick, using my 6cm round cutter.
 Yup, these scones were indeed heavenly as mentioned in Lena's blog... I love these scones so much...!!!
They tasted like what scones should be, crumbly, with the dry, cakey texture! Thumbs up for these scones:)

These scones will be best eaten after they were baked, or to be eaten warm.

 Do click on Lena's blog, Frozen Wings to see her wonderful bake of her scones...:))

Recipe with compliments from Lena:

Ingredients: (makes about 6 scones)
32gm butter
32gm sugar ( you can add a little more if you prefer a sweet scone )
1/2 egg
225gm flour
15gm baking powder
125ml milk
35 gm raisins (omitted )
pinch of salt
egg wash for glazing

Method:
1. Preheat oven to 200C. Combine the butter and sugar and mix till creamy and fluffy. Add the egg.
2.Add in the flour and baking powder and mix till a crumble forms. Pour in the milk and mix to a smooth texture.Do not overwork as this will toughen the texture. Add the raisins if using and roll out the dough to a 3cm thickness on a lightly floured surface.
4.Use a cookie cutter to cut out individual pieces, i used a 5cm round cookie cutter and arrange them side by side on a baking tray. Glaze with egg mixture and bake in the oven for 10 minutes or till they are golden brown.

Friday, June 29, 2012

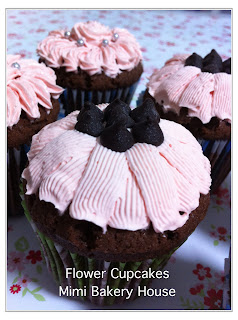
Flower Cupcakes

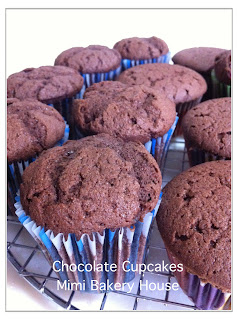
Well, to tell you the truth, I don't remember exactly which chocolate cupcakes recipes are these... I had made these a couple of weeks back but I hadn't been able to post them up during working hours, thus some of the posts are really out-dated... Sorry... I just can't find much time at home to use my lappy with the gals at home... So for the time being, these posts will be just for viewing purposes:-p
I had made these flower cupcakes for no particular reasons. Sometimes you just want to bake something and decorate something and just out of the blues, the feeling to bake... hehehe....
Chocolate cupcakes are the gals' favourite, in fact, all time favourite:-D
  And for me, just having fun, piping cream:-D
Here my pretty flower cupcakes... for viewing purposes... hehehehe....


Both of the girls wanted to decorate their own cupcakes, and they had requested me to allow them to do so. They were so excited about decorating their own cupcake...


These are the cupcakes Nic & Nat tried to decorate. With Nic's on the left & Nat's on the right...
Hahaha... Guess both of them had fun decorating their cupcakes. They had even wanted to bring a cupcake for a friend in school:-p

Thursday, June 28, 2012

Almond-Crusted Butter Cake

This is the 5th bake from the THB. And here we have the Almond-Crusted Butter Cake.

Emily, from the Emily's Cooking (Makan2) Foray will be the host for this bake. Do click on the link to find out the exact recipe.
I have tried and baked many butter cakes, and most of them are very oily and with lots of crumbs. But this butter cake... I just fell in love with it... Maybe I'm just a very "dry"person???? Hahahaha.... 

Even without the baking powder, the cake risen nicely and it's texture really did turned out so superb!!!

A very unimaginable result I'd get from this recipe...
Mmmmm..., We all loved it very much!!!

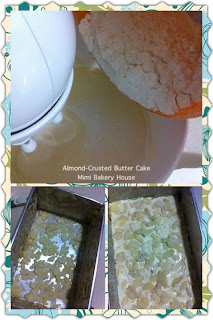
I had used half of the portion stated in the recipe as it yields a very huge loaf. So halving the portion, I had used a 5"x8"x4" cake pan as seen. Coating the bottom and sides of the pan with butter, followed by the almond flakes.

Here we have, the bottom of the cake, all coated with almond flakes...
And the sides of the cake. As I did love almond flakes very much, so I had also sprinkles the flakes onto of the cake. And being very generous with the almond flakes, I think it goes so well with the butter cake...;-p
A very well-baked butter cake I would say. Unlike the usual ones that I had baked before.

Cake texture was excellent, plus the fact that it was NOT oily, a slightly-dry cakey texture... I really love this cake very much and I foresee myself baking more in often:-D
I'm not sure about you, if you do like the slightly dry texture, unless the normal moist, oily butter cake that we always have..., but I would say this butter cake suits us very well:-p

Click on the badge to bring you to THB;-D

And of course, here is MiMi, can't wait to try the cake. Having a few bites, she left the cake on the floor. Both Nat & Mimi were more interested in the toasted, crispy almond flakes instead... hahahaha...
If you are a butter cake lover, do try this recipe. I am sure you will love it as much as we all do:))

Wednesday, June 27, 2012

Pandan Kaya Cake - Revisited

Posting up whatever I can now....

This pandan kaya cake was a revisited recipe... I think I had kind of forgotten how to make this exactly... My 1st attempt was in fact about 1 year ago... And this time, I had made it again as my colleague had asked me to bake one for her for a very very long time, as this cake was her favorite...
Had a little hiccups when I was making this... I couldn't remember how exactly the kaya paste was supposed to be... End up I thought I did wrong, and I threw away the kaya... Gosh... I told hubby, my bakings skills must have disappeared and I have lost my touch...
Nevertheless, I tried my kaya the next night, and I realsied that I hadn't done wrong, and all was in order. It was just becasue I couldn't remember how it should be.
Overall of this pandan cake cake... Good!!!!


I tried making this pandan kaya cake again one of the weekend... But it turned out to be a mess...
Texture of the kaya was horrible.... It tasted more like soft jelly... Oopsie...
What an attempt...:((
But I will try doing another pandan kaya cake soon... :-p

Monday, June 25, 2012

Bake-Along #27 - Fruit Scones

I had baked this scones tonight and pre-post this. Browsing through a few scones recipes, I decided to opt for this recipe as it was the easiest one, plus no refrigeration was needed. We do not realy fancy those fanciful scones, just purely plain scones or the ones with chocolate chips do just fine for us:-p

Joining along for the Bake Along #27, let's find out the recipe for this chosen recipe:-D

I had replaced the fruit with chocolate chips instead, as if I used raisins or cranberries, none will eat them.. This is the 3rd time I had made scones, and this recipe wasn't not too bad but it would be have better if I made the scones thicker. And also if I had watched the heat of the oven... hehehe.. Otherwise texture of the scones will be soft & crumbly, which will make it very delicious.
 These chocolate chips scones do go very well with the jam, or even perhaps with butter or cream cheese.
 Having half of the portion of the recipe, it yields about 10 small little mini scones.
 Here is Mimi, having her fair share of her food tasting the moment she sees these scones... hahaha....

Ingredients:
200g self raising flour
50g caster sugar
50g margarine (I used butter)
1/4 tsp of salt
100g raisins (I used chocolate chips or simply palin scones)
1 medium egg
5 tablespoon of milk

Method:
 Step 1. Preheat oven at 220C.

Step 2. Sift the flour into a large bowl, mix well with the sugar. Cut the butter into small little cubes. Using fingertips to rub the butter with the flour mixture into crumbles.
 Step 3. Add the chocolate chips, mix well.
 Step 4. Beat the egg, and take out a spoonful out for brushing the scones later. Beat the egg and mix well with the milk. Pour it into the flour mixture.
 Step 5. Mix well and knead it into a dough.
 Step 6. Roll it out flat, about 1.5-2cm thick. Using a round cuuter to cut out the shape for the scones.
 Step 7. Place the shaped dough on the tray and brush them with egg wash. Bake in the oven for about 10 mins or until they are golden brown.
Note: Do try to bake at the recommended heat and timing as indicated.

Do click on the following links to find out what the Bake-Along hosts had done for their bakes, and the wonderful bakes from other bakers too:))

Saturday, June 23, 2012

Pear Pinwheel & Hazelnut Cake

I was browsing Joyce's blog, Kitchen Flavours that day, and I came across this little badge on her blog.

THB - The Home Bakers , a bakers group created by Joyce. And we will be baking all the recipes from a chosen book on every 3 weeks. For this time, they had chosen "Coffee Cakes" by Lou Seibert Pappas.
Each member from the group will be selecting one recipe from the book and only the host for the selected recipe will be allowed to post the recipe, while the rest will try to bake it and link on the host's page. Giving tips and advices on the bake, will allow everyone to learn something new. That's all:))
So here I am, joining them in this group, to try out all the recipes from this book. I ordered mine from Fishpond. So far I had baked 2 of the recipes, and I do quite like the cakes. Pretty unusual ones and yet delicious.
For this post, this is actually the 4th bake for this book, and I managed to bake in just in time before the deadline.. Hmmm, school holidays will be over by this weekend, and I think I am trying to bake as much as I can within this week. Schools start and I will have lesser time to bake as I need to supervise Nic's homework, and plus the girls need to go for the enrichment class. Good bye holidays and back to the hectic school life... :-p

Alright, back to the main point... The Pear Pinwheel Hazelnut Cake will be host be Zoe, Bake for Happy Kids. Do click on her link for the recipe.
I had used almond meal instead of hazelnut. As for the pears, I had bought them from the supermarket, and it was called "Blush" Pears?? Not too sure, but the pretty colors on the pears did caught my attention, so here they are with me, ready to be baked into this lovely cake.
Batter's all ready, with the sliced pears arranged as pinwheel. I had used a 20cm round pan, coated with butter. Well, in fact, this is my 2nd time coating my pan with butter. And then only I realised that, it was so much easier to do so, plus it is definitely cheaper than using the parchment paper. :-p
As my cinnamon powder had longer expired, I did not get any new ones. So what I have now is the ginger powder. So with a dash of the ginger powder + the confectionery sugar, I tossed them up with the pears before arranging the on the batter. Taste wise still ok... hehehehe....
I had made a half portion of the original recipe. Do refer to Zoe's blog for the exact recipe.
Overall about this cake : it was really tasty. A soft, moist, nutty texure.

It does reminds me of the Pear & Frangipane Pie I made last year, using the almost same ingredients, but the difference was that it was on a "pie" version. It tasted as good as this Pear Pinwheel & Hazelnut Cake too:))
Hope you do have fun trying out this recipe.:))