Showing posts with label bread. Show all posts

Saturday, November 10, 2012

Apple Bread Pudding苹果面包布丁

Hahahaha... sometimes when I think back, I might be outdated... Reason being.. I am always late.. Regardless being the Aspiring Bakers Theme I hosted for October, I didn't even posted any entry for myself, being late for Bake Along, THB, and many others.... hahaha, till sometimes I also can't remembered which recipe I had used...

Today I had an Apple Bread Pudding, topped with raisins & chocolate chips....
I have gotten this recipe from one of the cookbook I had bought from Taipei... Regretted not doing my "homework" in SG to see what books I could have gotten from there... I shall do my "homework" and buy more books when I am in Taipei next March... Hehehehe...
This apple bread pudding was surprisingly easy to prepare and bake.
I hadn't baked bread pudding before, so I wasn't too sure of how I should go about it. Plus the cookbook are in chinese, so taking my time to read and making sure I had followed and gotten the steps and ingredients correct:-p
Well, pudding turned out well and delicious. I was glad that I had added some chocolate chips in the pudding, and I should hve added more as it would really turned out very tempting with a combination of the apple & chocolate chips... I will omit the raisins next time or lessen them as they are not my favourite...:))
It was delicious indeed, and I couldn't help myself finishing one pudding after my photo-takings...
Here, have one too and enjoy....:)
Ingredients:
2 pcs of diced bread
1 apple, cored, peeled & diced
5g butter
1 tbsp sugar
30g raisins soaked in 1 tbsp of Rum

2 eggs
200ml milk (i use lo-fat milk)
40ml whipping cream
20g sugar

Method:
1. Cook the diced apple with the butter under low heat. Add in the sugar and cook for awhile.
2. Put the apples, bread, raisins into the ramekins. Set aside.
3. Prepare the egg mixture. Beat the eggs, milk & whipping cream until well combined. Add in the sugar and mix until the sugar had dissolved.
4. Pour the egg mixture into the ramekins and baked at 190C for about 35-40mins.

Wednesday, July 11, 2012

Pizza Using Wraps as Base

This is definitely a very lazy method...
But it is a very quick method to prepare & make pizzas for the kids whenever they feel like having one... Well, now we don't really have to "ordered" for one, as this quick & easy method suits us very well... Lazy me as usual.... kekekekeke...
And I have Nat here, very enthuastic in helping out to prepare the pizza...
And here we have, our quick method of pizza, all ready within 15mins:)

For those of you like me whom like to prepare a quick pizza:
Wraps
Tomato paste or Sparghetti sauce
Ham
Mozerella cheese
other ingredients as desired

Method:
Spread sauce over the wrap, topped with ham followed by mozerella cheese.
Bake at 200C for about 15mins.

Monday, July 2, 2012

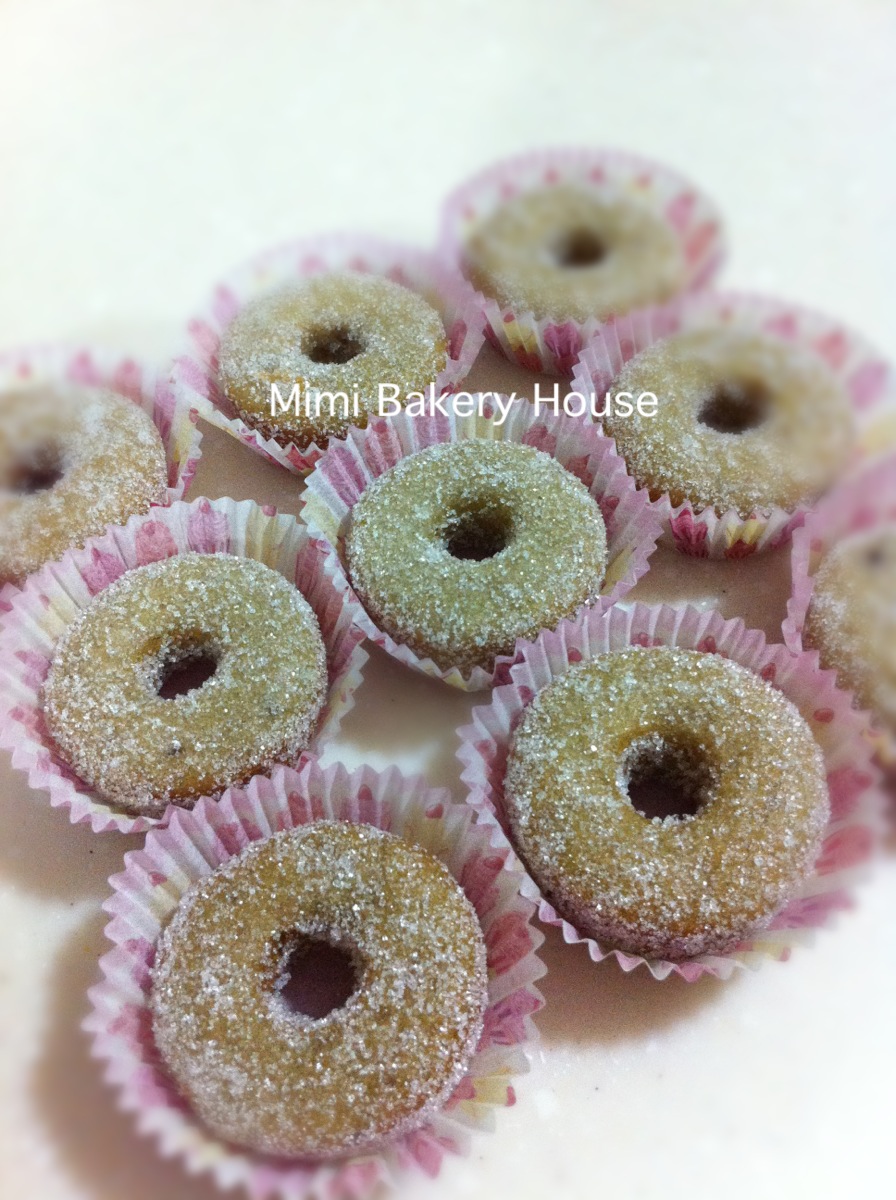
Donuts are just so fun!!!! - Mini Sugar Donuts

Hehehe... We did had alot of fun with these baked little mini donuts... Or rather should I say, I was having so much fun with it...

My dear hubby had preferred sugar donuts than the ones coated with chocolates & sprinkles. On the other hand, the girls preferred those coated with chocolates.

Nic told me, "Mummy, I am going to bring some more mini donuts to school. My classmate had asked me for some more. They have to pay me.. 10c per donuts..." So I told Nic, it was okay, just bring for her classmates to eat. But Nic replied,"They have to pay for the food that they are eating right?"
Me, -_-"
Alright, probably that a sign that she might be a business woman in future... hahahah!!!!

This time, I will be trying out the recipe from Blessed Homemaker...
Doesn't these donuts gave a lovely shiny browned look??? I was like... hmmm, these donuts must be great too... Tossing the donuts halfway through the baking time to give them a lovely shine.
Oh goody!!! These donuts are ready!!! Texture was good, soft & fluffy. But these donuts wouldn't last too long as the taste texture will be different.
And of course, I had tried to coat them with sugar... Yes!!! It did stick to the donuts nicely... So there we go, 16 mini sugar donuts were gone within minutes..
Nat loves these mini sugar donuts too...:))
Recipe with compliments from Blessed Homemaker:

Ingredients:
100g all purpose flour (I used cake flour)
50g caster sugar
3/4 tsp baking powder
3/4 tsp baking soda
1/4 tsp salt
1 egg
150g yoghurt (I used low fat strawberry yoghurt)
1 tbsp canola oil
2 tsp lemon juice (omitted)

Method:
1. In a small bowl, combine all dry ingredients.
2. Combine egg, yoghurt, oil & lemon juice, mix well.
3. Combine the dry ingredients to the egg mixture, mix & blend well.
4. Pipe batter into the pan, about 3/4 full.
5. Bake at 200C for about 10-15 mins
6. Cool in the pan for about 5 mins before transferring into the rack.
7. Decorate as desired.

Sunday, July 1, 2012

Donut Day - Assorted Mini Donuts (Strawberry Flavor)

Ain't these little mini donuts a cutie...???
Nah, I didn't buy these cute mini donuts... I made them...

We were all in for a big treat this time....

I had came across 2 baked recipes. One from Ellena, from Cuisine Paradise and one from Blessed Homemaker.

Today I will bake these donuts using Ellena's recipe.
I had KIV these baked donuts for almost a year. I had 1st came along the baked donuts from Blessed Homemaker. I had wished to bake some then but I did not invest in a donut pan as I had just started my baking last year. I wasn't so prepared to spend so much money at that time.:-p
So finally, I bought it last week... I had bought it from Bake King shop. It cost about S$8.00.
There... my 1st donut pan, a small little mini ones... As my oven is rather small, so this size pan fits it well. :-p
I had greased the pan and piped the batter into the pan.
(As it is a non-stick pan, thus it is unneccessary to grease it)
Ta-da!!!! A very nicely baked donuts using low fat strawberry yoghurt. While the donuts were half way through baking, my friend & I were so excited. We were so excited that the donuts had risen very nicely and we can't wait to taste them. With the sweet frangrance of the strawberry yoghurt, my friend had asked me to give him one immediately when the donuts were baked.
And......
He said the donuts were excellent!!!
Texture of the donuts were great! It was rather soft. The girls were all pretty excited too...
Decorating the donuts with whatever I had at home, it was actually great fun doing so...:))
Here, the mini donuts were all packed up nicely for the testers in my office the next day...
These mini donuts were best eaten on the same day, otherwise the texture will be different. Unlike the fried donuts with the bread texture, these minis had a little cake texture. Though testers & I had eaten these minis on the next day, we still think that the donuts were still alright, only 2 whom said that they were slightly hard.

MiMi, of course, having her fair share of her mini donuts... She had 5 donuts, and as she knew that whenever she eat something, she had to pose for mummy...
Check out her poses...hehehehe...
Recipe with compliments from Ellena, Cuisine Paradise 

Ingredients: (makes about 20 minis) (with slight modifications)
1 1/4 Cups Top Flour, sifted (160g cake flour)1 Teaspoon Baking Powder
Pinch of Salt
150ml Mixed Berries Yoghurt (Meiji Strawberry Yoghurt)1/4 Cup Castor Sugar (50g)1 Large Egg
3 Tablespoons of Melted Unsalted Butter, cool (45g)Zest of 1 Lemon (omitted)1 Disposal Pipping Bag, optional

Method:
1. Grease mini heart shape/donut pan with cooking spray or melted butter and set aside. (You can omit this step if you are using a non-stick pan)2. In a medium mixing bowl whisk sugar and lemon zest until moist and fragrant.
3. Crack in the egg and give it a quick whisk till combined before adding the yoghurt and mixed well.
4. Next sieved in flour, baking powder, salt and whisk together with melted butter till the mixture resemble paste like texture.
5. Spoon mixture into disposal pipping bag, snap off the tip and pipe into prepared trays at about 3/4 full.
6. Bake in preheated 180 degree oven for about 8 - 10 minutes or until donuts spring back when touched.
7. Cool donuts in pan for another 2 - 3 minutes before removing it from tray.
8. Decorate the donuts with melted chocolate, sprinkles, fresh fruits or etc.

Saturday, June 30, 2012

Simply Scones - 2 different recipes

I love scones very much...
 The scones go very well with butter, jam or cream cheese.. yummy...

After the 3rd attempt from the Bake-Along, I was very keen to try another recipe. So being aunty again, I was browsing a "Yum Yum" magazine in the supermarket... Flipping through the pages, I came across a raisin scone recipe and again, I snapped shot the recipe instead of buying it...:-p
I had used self raising flour instead of flour+baking powder, that perhaps my scones did not really rise that much. It kinda look like "pong piah"??? hehehehe...
As the scone recipe had milk powder in them, it tasted very "milky". But spreading the scones with butter & jam, did covered away the milky taste.
Ingredients adapted from Yum Yum magazine:
(A)
250g lain flour
15g baking powder
50g caster sugar
100g milk powder(can used lesser if you do not like the milky taste)
1g salt

(B)
120g butter
60g raisins(omitted)
100ml milk

Method:
1. Preheat oven to 180C.
2. Put ingredients A into a mixing bowl, add in butter and rub with fingertips till you get a fine breadcrumbs texture.
3. Add raisins, milk & mix lightly until well-combined. Do not over knead the dough.
4. Roll out the dough into 2.5-3cm thick and cut into a 2" round dough. Brush with beaten egg.
5. Bake in the preheated oven for about 15-20 mins.


I had also tried Lena's scone recipe from her recent bake... Her scones did tempted me so much... Unfortunately, I wasn't able to get a nicely baked color like Lena's....
 Well, at least now I am getting some decent looking scones from Lena's recipe... This time, I had made it about 3cm thick, using my 6cm round cutter.
 Yup, these scones were indeed heavenly as mentioned in Lena's blog... I love these scones so much...!!!
They tasted like what scones should be, crumbly, with the dry, cakey texture! Thumbs up for these scones:)

These scones will be best eaten after they were baked, or to be eaten warm.

 Do click on Lena's blog, Frozen Wings to see her wonderful bake of her scones...:))

Recipe with compliments from Lena:

Ingredients: (makes about 6 scones)
32gm butter
32gm sugar ( you can add a little more if you prefer a sweet scone )
1/2 egg
225gm flour
15gm baking powder
125ml milk
35 gm raisins (omitted )
pinch of salt
egg wash for glazing

Method:
1. Preheat oven to 200C. Combine the butter and sugar and mix till creamy and fluffy. Add the egg.
2.Add in the flour and baking powder and mix till a crumble forms. Pour in the milk and mix to a smooth texture.Do not overwork as this will toughen the texture. Add the raisins if using and roll out the dough to a 3cm thickness on a lightly floured surface.
4.Use a cookie cutter to cut out individual pieces, i used a 5cm round cookie cutter and arrange them side by side on a baking tray. Glaze with egg mixture and bake in the oven for 10 minutes or till they are golden brown.

Monday, June 25, 2012

Bake-Along #27 - Fruit Scones

I had baked this scones tonight and pre-post this. Browsing through a few scones recipes, I decided to opt for this recipe as it was the easiest one, plus no refrigeration was needed. We do not realy fancy those fanciful scones, just purely plain scones or the ones with chocolate chips do just fine for us:-p

Joining along for the Bake Along #27, let's find out the recipe for this chosen recipe:-D

I had replaced the fruit with chocolate chips instead, as if I used raisins or cranberries, none will eat them.. This is the 3rd time I had made scones, and this recipe wasn't not too bad but it would be have better if I made the scones thicker. And also if I had watched the heat of the oven... hehehe.. Otherwise texture of the scones will be soft & crumbly, which will make it very delicious.
 These chocolate chips scones do go very well with the jam, or even perhaps with butter or cream cheese.
 Having half of the portion of the recipe, it yields about 10 small little mini scones.
 Here is Mimi, having her fair share of her food tasting the moment she sees these scones... hahaha....

Ingredients:
200g self raising flour
50g caster sugar
50g margarine (I used butter)
1/4 tsp of salt
100g raisins (I used chocolate chips or simply palin scones)
1 medium egg
5 tablespoon of milk

Method:
 Step 1. Preheat oven at 220C.

Step 2. Sift the flour into a large bowl, mix well with the sugar. Cut the butter into small little cubes. Using fingertips to rub the butter with the flour mixture into crumbles.
 Step 3. Add the chocolate chips, mix well.
 Step 4. Beat the egg, and take out a spoonful out for brushing the scones later. Beat the egg and mix well with the milk. Pour it into the flour mixture.
 Step 5. Mix well and knead it into a dough.
 Step 6. Roll it out flat, about 1.5-2cm thick. Using a round cuuter to cut out the shape for the scones.
 Step 7. Place the shaped dough on the tray and brush them with egg wash. Bake in the oven for about 10 mins or until they are golden brown.
Note: Do try to bake at the recommended heat and timing as indicated.

Do click on the following links to find out what the Bake-Along hosts had done for their bakes, and the wonderful bakes from other bakers too:))

Wednesday, December 28, 2011

Strawberry Swirl Loaf

Couple of weeks back, I saw from Vivian's Blog, she did a strawberry swirl loaf. Her loaf was really soft & fluffy, and the swirl was beautiful as well.

Well, I thought, let me try baking this loaf. The last time I tried doing a Chocolate Marble loaf, the results wasn't that fantastic. So I gathered, after all, I wasn't much of a bread-maker...hahaha....


Strawberry Swirl Loaf


Well, this time I was actually quite pleased with the result though.

The texture of the bread was really soft as what Vivian had mentioned.

A good try indeed. The only cons was that, I did not really like the taste & smell of the strawberry though... Even hubby and Nic didn't like it as well... :-p So end up my helper finished the whole loaf... She said it was nice & soft.... hahaha, at least it wasn't wasted...
Recipe adapted from ViVian Pang's Blog:


Ingredients:

(A)

200g bread flour

20g sugar

¼ tsp salt

3g yeast (½ tsp + ¼ tsp)

35g whole egg100g milk

(B)

15g margarine/ butter
2 tsp strawberry paste (I use 1 tsp)


Methods:
1. Put all the ingredients (A) inside kneading bowl. Knead to form dough.
2. Add in margarine and knead to form smooth and elastic dough. Weight 150g dough out. Add in strawberry paste and knead till well combine. This will be the strawberry portion. Cover both dough and rest for 1 hour 30 minutes.
3. Transfer both dough to working surface. Slightly knead to remove air bubble. Shape into balls and rest 10 minutes.
4. Flatten the strawberry dough into rectangle. Same with the plain dough(slightly longer). Then, stack the strawberry dough on top and roll up like swiss roll.
5. Place the dough inside a greased sandwich tin and rest for 45 minutes.
6. Bake in preheated oven 180C for 28-30 minutes. Once cooked, immediately remove from mould and leave to cool on wire rack.

Thursday, December 15, 2011

Mini Chocolate Chips Scones

How would you like to have a mini chocolate chips scones?

I must say, these scones are yummy...!!!


Recipe is actually a plain scone, but I thought I should add some chocolate chips in them, so that my girls will eat them. hehehe...


MINI CHOCOLATE CHIPS SCONES


Well, the usual size scones might be a little too big for my girls. So these mini ones are jus nice for them, and for us, just popped it inside our mouth.. :-p
As usual, I can't wait to try these scones, so I took one of from the oven when it was almost baked... Wah..... I must say it is good...
For those of you whom like plain ones, it will go very well with jam & butter:)

Hubby and Nic tried the minis, and they liked them as well. Hubby said it will taste even better if there were more chocolate chips... hahahaha....

For scones lover, hope you will like this recipe.


Ingredient:

(Receipe adapted from 孟老师的下午茶)

150g plain flour

1tsp baking powder

20g sugar

1/2tsp salt

40g unsalted butter

1 egg

20g milk


Method:

1. Add sieved flour, baking powder, sugar and salt into a large mixing bowl.

2. Add the cube butter into the dry ingredients.

3. Create a well in the dry ingredients, add in the beaten egg mixed with milk. Use a fork to mix the dry ingredients, butter, egg & milk. Mix well.

4. Using your hands, mix the ingredients to form a dough. Chill the dough for about 30mins.

5. Roll the dough flat, about 1.5cm thick. Rest them for about 10mins.

6. Brush the dough with egg wash and bake in a preheated oven of 180C for about 25 mins.

Wednesday, October 19, 2011

可可蒸面包 Steamed Chocolate Bread

I really wondered why these are call "Steamed Cup Bread" from the recipe book.

My chinese is rather bad, and maybe they are, and maybe they are not...


But they do taste like "发糕“= Hubby said,"这个根本就是发糕吗!为什么你说是面包哪?“

Seriously, I also don't know... hahahaha....!!!


可可蒸面包


This recipe is the same using the Original CupBread Recipe.


In addition, I just add abt 2 tbsp of cocoa powder & some chocolate chips in the batter.


Have fun:))