Showing posts with label self raising flour. Show all posts

Saturday, December 1, 2012

Coffee Oreo Chiffon Cake

Ok.. I have been lying... Old habits die hard... Still looking for recipes to try over the weekends.. Hahaha... Am I the only one behaving in this manner? kekekeke....

I was browsing in the Baking Wonderland this morning and this recipe had once again caught my attention...
The Vanilla Oreo Chiffon Cake that June Lee had baked looked very tempting... So after thinking for the whole day, I finally decide to try a Coffee Oreo Chiffon Cake.
This Chiffon Cake seems to be a little dry texture... Hmmm, probably need to add in a little more milk and oil. Otherwise, it would had been an excellent chiffon. The cake rose well, without any sunken signs.
You might like to try this chiffon cake, but do remember to add more milk/oil to get a softer & moist texture.
Have fun:)
Recipe as adapted from June Lee, Baking Wonderland
(with slight modifications)
I had used about 1.5 tsp coffee powder & 6 (2x6) mashed oreo cookies. Could have used more coffee powder to get a stronger coffee flavour:-p

材料:
材料A: 蛋黄3个,砂糖50g,牛奶和植物油各3汤匙,香精1/2-1茶匙。
材料B: 自发面粉100g(过筛)
材料C: 蛋白3个,砂糖50g,塔塔粉1/4茶匙。

做法:
1) 把材料A全部放到一个较大的容器里(我用小面盆),用手提打蛋器(不是电动)拌匀至油,蛋黄和水完全混合,然后加入材料B拌均备用。
2) 一般做法把蛋白霜打至硬性发泡,最后将做法1+2混和均匀即可。
3) 面糊倒入烤模后在桌上轻丢几下震出大气泡,以180度最底层上下火烤50分钟。出炉后马上倒扣至凉才脱模。

 
A: 3 egg yolks, 50g sugar, 3 tbsp milk and 3 tbsp canola oil, 1/2-1 tsp vanilla essence
B: 100g self-raising flour (sifted)
C: 3 egg whites, 50g sugar, 1/4tsp cream of tar tar
Method:
1) Mix A,using a hand whisk, mixed untill well combined.Add in B and mix untill well blended. Set aside.
2) Beat the egg whites, cream of tar tar & sugar till stiff peaks. Taking 1/3 of the egg white meringue to mix into Step 1. Pour the mix batter into the remaining meringue & mix until well blended.
3) Pour the batter into the pan, knocking the pan to release bubbles, Bake at preheated oven of 180C for about 50 minutes. Unmould the cake upside down immediately to cool.

Sunday, November 18, 2012

Steamed Pandan Peanut Cupcakes

I have a busy weekend... I had been to SG Popular Book Fair at the Expo Hall on Saturday. But it didn't thrill me much as the cookbooks were as cheap as they were supposed to be... So yesterday, I headed down to JB and I decided to go to thier Popular Fair at Danga City Mall. I did not know where it was, but luckily the lady boss of the nail shop was kind enough to let me use her wifi to check the location. It was pretty easy to find the mall in the end. And of course I had grabbed at least 7 books which were so valued for money!!! Needless to say, my gals & my niece bought their loot as well...

Adding another steamed cupcake to the November Aspiring Baker's theme, this is a Steamed Cupcake I had gotten from Alex Goh's Steamed Cake.

These cupcakes had caught my attention as it was pandan flavor and they looked very pretty. But of course, Alex Goh put red bean filling whereas hubby suggested to use peanuts instead.
It was a little difficult to put the peanut fillings in the centre as "it" will "run" everywhere else in the cupcakes... So I had actually "dug" a hole in the centre and put in the peanut fillings, and fill them up with the remaining batter.
So, what do you think of them?
Recipe as adapted from Magic Steamed Cake by Alex Goh
(slight modifications)

Ingredients:
(A)
4 eggs
250g sugar
1/2 tsp salt
120ml canola oil

(B)
2 tsps pandan juice
few drops of green coloring
200g coconut milk
(I had used 2 tsp pandan paste instead of the pandan juice & green coloring)

(C)
400g flour
1 tsp baking soda
1 tsp baking powder
(I had omitted all and used self raising flour instead)

Method:
1. Whip A until sugar dissolves and slightly thicken. Add in B, mix until well blended.
2. Fold in sieved C, mix until well blended.
3. Pour the batter about 1/3 of the 7cm cupcake mould lined with paper cup. Steam for about 2-4mins.
4. Remove from heat and place the peanut fillings in the centre & press lightly.
5. Top with the remaining batter and steam for another 15-20mins over high heat.

Fillings can be omitted or changed to your preferred fillings like red bean paste, etc.
Have Fun:))

I am submitting this to Aspiring Bakers #25 – Steaming Hot Cakes (November 2012) hosted by Miss B of Everybody Eats Well in Flanders. 

Saturday, November 17, 2012

Steamed Chocolate Cupcakes

Yes, Steam Cakes are indeed in trend this month in my home... And I am enjoying it very much. I had given alot of steamed cakes to my friend, and her hubby mentioned that I seemed to be enjoying doing so... So I told my friend, this month onwards my daughter will be starting her school vacations, plus my boss is not in SG, so taking all these time available to bake again...

I had bought this "Steamed Cakes" recipe book when I was in Penang last October, but I had never tried any of the recipes since I bought it till today.
From this book, I had selected the Steamed Chocolate Cupcakes as the ingredients were rather basic. Some of the other recipes required evaporated milk and condensed milk, which I wasn't too keen in them.
A full ingredients could actually fetch quite a number of cupcakes, depending on the size of your paper cups.
*Note: It is better to use those "paper" cupcake cases as compared to the other cupcake cases as the paper cups will "opened" up during steaming.
These steamed chocolate cupcakes were not too bad. I had modified some of the ingredients. Cutting down a huge amount of the icing sugar, using margarine instead of butter, and replacing the hot water with milk too. The cupcakes did turned out well, soft and moist, but a little not so sweet.. So perhaps I should increase a little more sugar...hehehehe...
The gals loved these cupcakes too. I was glad that they liked it. Mimi had 2 of them and she said it was yummy. My friend who tried the cupcakes said they were delicious as well.
Would you like to try one as well?

Recipe as adapted from the Steamed Cakes by Mdm Zubaidah Bte Chepa

Ingredients:
Yields about 16 medium size cups & 16 mini size cups
250g superfine flour (I use self raising flour)
1 tsp baking soda (omitted)
75g cocoa powder
350g icing sugar (I used 200g)
250g butter (I used margarine)
3 eggs
1 bowl of hot water (I used 250ml cold milk)

Method:
1. Beat butter & sugar until smooth.
2. Add in the egg one at a time, mix well at each addition.
3. Add in the flour+cocoa powder, alternating with the milk. Mix until well blended.
4. Pour batter into the paper cup cases and steam over high heat for about 10mins.
(If you are using my ingredients, you can fill the batter till full as the cupcakes will shrink a little after removing from heat)

I am submitting this to Aspiring Bakers #25 – Steaming Hot Cakes (November 2012) hosted by Miss B of Everybody Eats Well in Flanders

Friday, November 16, 2012

Eggless Passionfruit Cupcakes无蛋百香果蒸蛋糕

 Actually I am having so much fun with Aspiring Bakers theme this month. This "steaming" theme had made me digged for my recipes, of which some are "fun with colors", while the rest are healthy versions.

I had bought the recipe book in JB last weekend, and this book caught my attention, Eggless Cakes & Cookies,  无蛋糕饼, by Chef Jamie Jong. I flipped through the pages and found the recipes quite interesting... So "it" came back home with me...
 Sharing this wonderful recipe I had found inside, it was actually a Green Tea Steamed Cupcake, but I do not have green tea powder at the moment. So I had subsituted with Passionfruit and added a tsp of vanilla essence to enhance the cupcakes flavor.
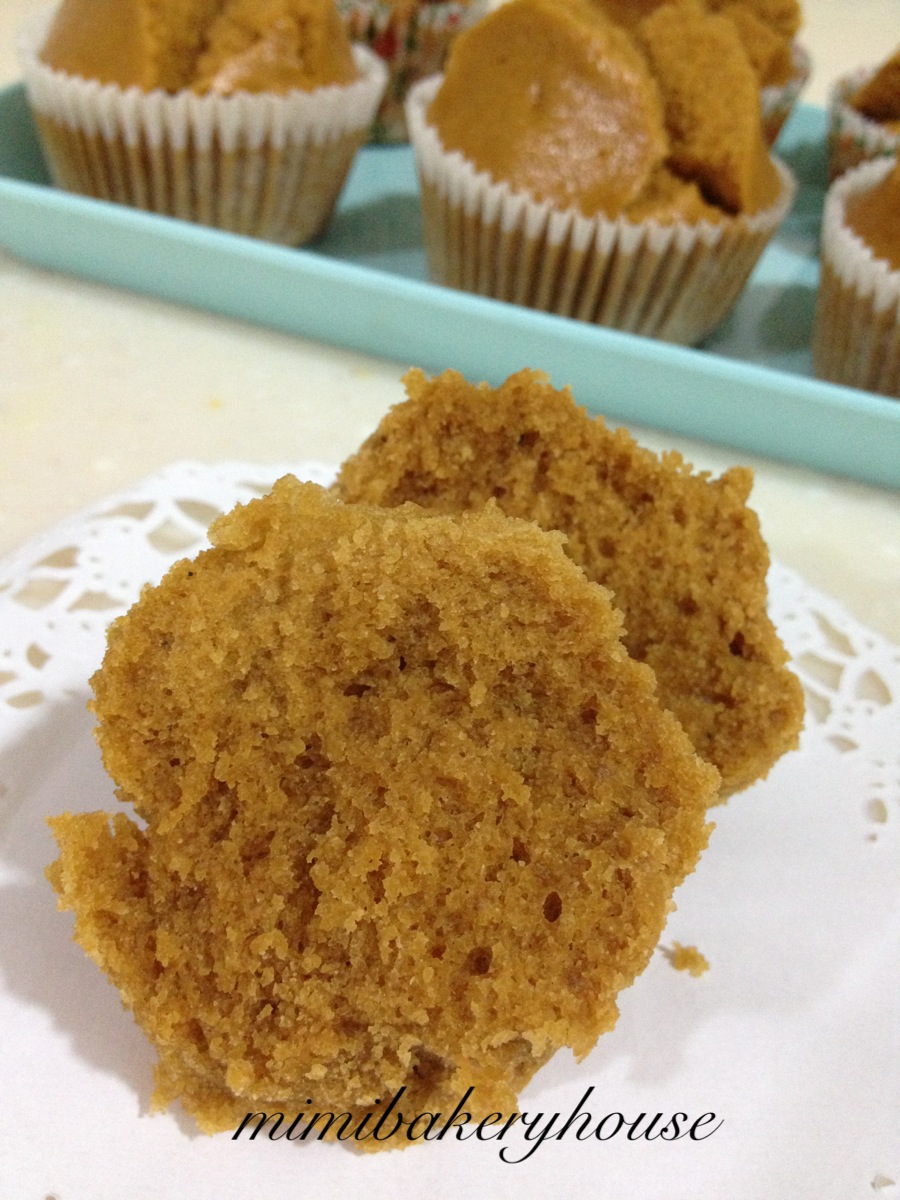
 These steamed Passionfruit Cupcakes were excellent. No eggs used, plus margarine, it made these cupcakes so healthy... The cupcakes texture was very soft and spongey. Some of the top "huated" part almost dropped out when I was taking them out of the steamer... hehehehe...
 If you could see the fluffiness in this picture...
We all liked it very much.. mostly importantly, it is a healthy cupcake:-D
Recipe as adapted by Jamie Jong, 无蛋糕饼.

Ingredients:
320g self raising flour
1 tsp baking powder (can be omitted)
150g sugar
160ml water
130g margarine
1 passionfruit pulp, about 50g-100g
(1 tsp vanilla essence optional)

Method:
1. Combine sugar, water & margarine in a sauce pan, stir over simmering water till smooth. Set aside and let it cool.
2. Make a well in the centre of the sieved flour+baking powder, pour the liquid mixture slowly and mix till well blended.
3. Pour mixture into paper cups about 80%, steam for 12-15mins.

I am submitting this to Aspiring Bakers #25 – Steaming Hot Cakes (November 2012) hosted by Miss B of Everybody Eats Well in Flanders. 

Thursday, November 15, 2012

Steamed Huat Kueh 蒸发糕

Not alot of people these days like to eat Huat Kueh. I know it will probably be the older folks whom will like this kueh. For me, I do quite like it. What about you? Well, in fact, I found out that some of my colleagues and friends actually do like this Huat Kueh as well. What a surprise...:))
I used to have an excellent recipe for Huat Kueh too, but I seemed to have misplaced it when I moved house couple of years back... So I was waiting to see if I will ever come across a similar recipe which I vividly remembered what are the ingredients that were being used. Browsing in FB in the Baking Wonderland, I finally saw this recipe, and I decided to give it a try...
Yes, this recipe was excellent. It has given the Huat Kueh a very smooth and moist texture. We all liked it very much. Homemade Huat Kueh, or rather should I say, homemades will always be the best:-D
Steamed Huat Kueh 蒸发糕
食谱来自黄薇瑜
250g 黑糖 palm sugar
400g 自发面粉 self raising flour
300ml 椰浆奶 coconut milk
100ml 水 water

Method:
1。将黑糖和面粉过筛混合 Sift the palm sugar and flour together。
2。把椰浆和水倒入混合。Mix coconut milk and water together。
3。把第2步骤加入第1步骤混合均匀。Pour coconut mixture into the flour mixture,mix until well combined。
4。把面糊倒入纸杯 80%满,切个"X"在面糊上,蒸15-20分钟。Pour batter into cupcake case, cut a "X" on the batter and steam for 15-20 mins。

For better fragrant, I think we can boiled the coconut milk, water & palm sugar over low heat to enhance the taste.
I am submitting this to Aspiring Bakers #25 – Steaming Hot Cakes (November 2012) hosted by Miss B of Everybody Eats Well in Flanders. 

Sunday, October 28, 2012

Chocolate Chips Cupcakes 2

I had joined the Baking Wonderland Malaysia in Facebook, and from there, I have bookmarked lots of recipes in my phone... And I better updated those baked items into my blog before my phone is overloaded with all those recipes.

I had gotten this recipe from Michelle Heong from Baking Wonderland. These chocolate chips cupcakes were a delish! Soft texture... But 1 regret... I didn't add enough chocolate chips.. Hehehe, else it would have been heavenly delish with plenty of chocolate chips!!!

Here is the recipe:
Ingredients:
100g Butter
80g Sugar (75g)
2 eggs
120g self raising flour (125g)
1 tsp baking powder (omiteed)
20g cocoa powder
50g chocolate chips (can use more)
Adequate chocolate chips to sprinkle on top of the batter.

Method:
1. Cream the butter and sugar until well combined. Adding 1 egg at a time and make sure they are well-blended in each addition.
2. Add the flour into the mixture, mix well.
3. Gradually add in the milk.
4. Fold in the chocolate chips.
5. Pour the batter into the cupcake cases, about 80% full, bake in a preheated oven of 150C (180C) for about 35mins.

Tuesday, October 9, 2012

Chocolate Marble Cake

I must say this Chocolate Marble Cake is one of the best that I had ever baked... Unlike some, this cake is not too oily and most importantly, this cake texture is very soft and fluffy. This cake remains soft even on the next day.
If you are a butter cake lover, this one will suits you well...:)
Here is the original recipe as adapted from GoodFood Magazine (August 2012 issue)
Ingredients:
225g butter, softened
225g caster sugar
4 eggs
225g self raising flour
3 tbsp milk
1 tsp vanilla extract
2 tbsp cocoa powder

Method:
1. Heat oven to 180C. Grease a 20-cm cake tin and line the bottom with a baking paper.
2. Beat butter & sugar, followed by the eggs, one at a time, mixing well after each addition. Fold through the flour, milk & vanilla extract until the mixture is smooth.
3. Divide mixture between 2 bowls. Stir the cocoa powder into one of the mixture, mix well. Take 2 spoons and use them to dollop the chocolate & vanilla mixes into the tin alternately. Take a skewer or knife & swirl it around the mixture to create a marbled effect.
4. Bake the cake for 45-55mins. Turn out on a cooling rack and leave to cool. Will keep in 3 days in an air-tight container.