Showing posts with label cheesecake. Show all posts

Wednesday, November 14, 2012

Orange Cheesecake (Non-Baked)

I have never fancied adding orange essence into my cakes somehow as I do not like the taste of it. It seems to make me feel like as if I was taking those very bitter medicine when I was young... Hahaha... But to others, this orange essence was rather pleasant to them and in fact they do quite like it. How about you?
Reason of baking this cheesecake was because I have a pack of whipping cream which is due to expire soon. So I found this cheesecake using whipping cream... Hmmm but all ended up quite a mess as the whipping cream that I bought, did not whipped up as my top whipping cream...
In fact, being a non-baked cheesecake, this cheesecake is very easy to prepare and it should be ready by 15-30mins time.
I probably had exceeded the amount of whipped cream and I put in 250g of cheese instead of 200g. Thus the texture of the cheesecake was abit soft, more of like a mousse texture. Overall, it was quite yummy. My hubby had taken 2 slices of it, and my friend say it was delicious too. And she said she like the "orangey" taste of it:)
Ingredients as adapted from Kevin Chai.

Base:
140g crushed chocolate marie biscuits
70g melted Butter

Combine all ingredients. Press into a 7" square tin.

Cheese Filling:
200g cream cheese
70g sugar
2 tsp gelatine
2 tbsp water
200g fresh whipped cream
3 tbsp orange compound

Beat cream cheese and sugar until smooth.
Melt gelatine with water over simmering water. Add into cheese mixture until blended.
Fold in whipped cream, add in orange compound, mix well.
Spread cheese filling into prepared tin.

Topping:
80g crushed marie biscuits
40g melted butter

Combine all ingredients and sprinkle over the top.
Wrap well and refrigerate until set.

Sunday, September 2, 2012

Strawberry Jelly Cheesecake Cupcakes

It seems like quite a long time since my last post... I wondered what I had been up to... Not too much of bakes were being done plus I had been lazing around... Think partly I was into gmarketing past few weeks... :-p
Upon my colleague's request, I have made these strawberry jelly cheesecake into cupcake version. Easier to eat, plus a just nice portion for everyone:))
Using the same recipe I had did for the Strawberry Jelly Hearts Cheesecake

Tuesday, July 24, 2012

Mango Jelly CheeseCake

These Mango Jelly Cakes are very refreshing... I had made a Strawberry Jelly Hearts Cheesecake a couple of weeks ago, and I thought maybe I can try a mango one this time. This mango cheesecake had been a to-bake-list since last year, but I guess there were just simply too many bakes to be tested and to be tried out... So finally I have here, the Mango Jelly Cheesecake:))
Using the same recipe I had from the Strawberry Jelly Hearts Cheesecake, I had replaced everything else to mangoes.
Dice mangoes are mixed into the cheese mixture, topped with diced mangoes followed by the mango jelly.
  I had made the mango cheesecake into a 6" size plus 10 little cupcake sizes.
As for the mango jelly, I had used Hollyfarms Brand. This jelly is very soft and it goes very well with this cheesecake, and it sets off very well too.
Those cheesecakes in the cupcake cases were very good as they were more easily consumed and of course very convenient. No fuss no mess:))
My hubby and my housemate had ate these cupcakes, and both totally agreed that these cheesecakes were fantastic. Topped with lemon rinds, had given the cheesecake a very refreshing taste.
For those cheesecake & mangoes lovers, you might wanna give this a try?
You can find the recipe by CLICKING HERE

Friday, July 6, 2012

Strawberry Jelly Hearts Cheesecake

When my colleague resigned last year, she had bought some jelly cheesecake for us. It was really yummy. She had ordered the cheesecake from online... So one of my colleague happened to came across this Jelly Hearts Cheesecake on the Sunday Straits Time. She said these cheesecakes looked very delicious, and I should try making them. And only it came across my mind that these were the ones I had eaten then.

These jelly cheesecakes were indeed a great treat for all. We all loved it very much as they were very refreshing.

Here are the cheesecake, strawberries were placed into the chilled cheese batter.
The jelly was poured over the cheese batter after chilling in the fridge for one night.
There we have, all chilled and ready to be photographed, and tested of course!!!
This jelly as recommended was Tortally, strawberry flavor. Very wobbly & yummy! The girls loved these jellies very much:-D
This cheesecake is definitely a keeper for those of you who loves cheesecake.
And here, the testers, including myself... what do you think?
Simply awesome, yummmmmmyyyyy......!!!!

Ingredients:
170g digestive biscuits, crushed
85g melted butter
250g cream cheese (room temp)
250g condensed milk
juice of 1 lemon
2 tsp gelatin
50ml hot water
1 punnet of strawberries
1 box of 90g Tortally Strawberry Flavoured jelly crystals

Method:
1. Crush biscuits till fine crumbs. Add melted butter and mix until well combined. Put the biscuit mixture in a 8" springform pan. Chill for at least 1hr.
2. Cream the cheese until smooth. Add in condensed milk & lemon juice, continue to mix until well combined. Add in the gelatin mixture(dissolve gelatin with hot water), continue to cream for 5 mins until well combined. Pour ready cream mixture into the pan, & chill for a while.
3. Place the cut strawberries, decorate as desired, into the cream cheese mixture. Gently pressed them into the mixture, so that the strawberries do not glide. Leave to set in the fridge overnight.
4. Prepare the jelly mixture as indicated on the box. Once cooled, pour the jelly solution to the cheesecake and put in back in the fridge to set.

Thursday, May 10, 2012

Toblerone Marbled Cheesecake - Revisited

Natalie has requested for a toblerone cheesecake for quite sometime. So I decided to make one for her, a marbled one...:-D

How about a slice of this toblerone marbled cheesecake?

Here is Mimi, as usual, trying out her cake...
This Toblerone Marbled Cheesecake looks good....

If you will like to try one, please click HERE.

Sunday, April 15, 2012

Awesome Triple Chocolate Cheesecake Slice

Nat has been asking me to make a Toblerone Cheesecake for her for quite sometime, so did Hubby, as both of them love the Toblerone Cheesecake very much... Plus we still have 3 bags of Toblerone chocolate at home.. But, me, will likt to try baking another chocolate cheesecake that I had never tried before... I chanced upon this Women's Weekly Cheesecake book, that I bought a couple weeks ago.., A Triple Chocolate Cheesecake. So I decided to try this out. And I hope Nat will like this cheesecake...


Triple Chocolate Cheesecake

This is a baked cheesecake recipe, and the texture if the cheesecake is great. Well, it kinda taste more of a chocolate, rather than cheese I would say. My friends whom had tasted it say it was delicious and it was just simply chocolates.....


I thought, the cheesecake looks pretty good, and it is very easily prepared, no mess... So probably that's why I managed to take so many pictures for the post. :-D

The base, using chocolate chips cookies. The whole cookie is being used and the cookie is cut/trimmed to fill the edges/holes.

Below the white chocolate melted together with thick cream.
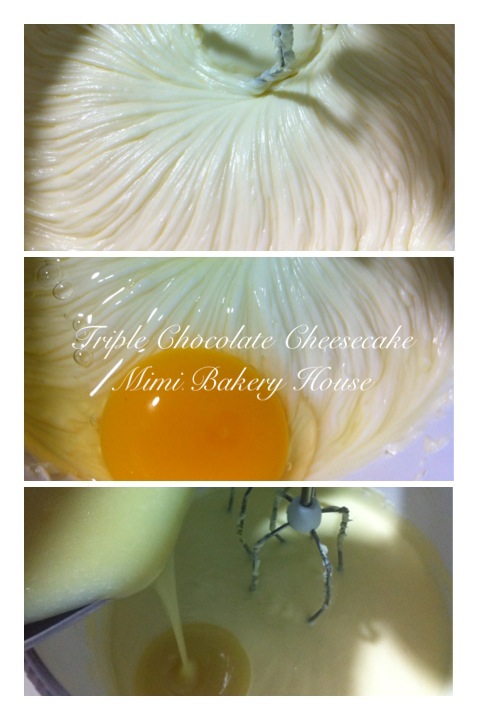
Below, creaming the cream cheese and sugar, followed by the egg, and the white chocolate mixture.

The base of the cheesecake, filled with the cheese fillings, and the chocolate ganache once the cheese filling has set.

And now, looking at this picture below, might explains why it is called Triple Chocolate Cheesecake?

1. Chocolate Chips Cookie base

2. White Chocolate Cheese filling

3. Dark Chocolate Ganache

???

So for those of you whom do not really fancy cheesecake, perhaps this one will suits you fine, as it is totally, simply chocolate taste.. hehehe!!! Do try it! A good time time snack or a dessert:))
Ingredients:

310g chocolate chip cookies

125ml thick cream

250g white chocolate, chopped coarsely

500g cream cheese

165g caster sugar

2 eggs


Chocolate Ganache

200g dark chocolate, chopped coarsely

80ml thick cream


Note: I used half of the ingredients stated, and a 8" square tin.

Below methods are of the full ingredients used.


Method:

1. Preheat oven to 150C. Grease 19cm x 30cm pan, line base and long sides with baking paper, extending 5cm over sides.

2. Place cookies, in a single layer, over base of the prepared pan, trim to fit, if neccessary.

3. Combine cream & white choclate in a saucepan, stir over low heat until smooth. Cool.

4. Beat cream cheese & sugar with an electric mixer until smooth. Beat in the eggs, one at a time, beat in white chocolate mixture.

5. Pour mixture into pan, bake about 35 mins or until set. Cool in oven with door ajar. Refrigerate for 3 hours or overnight.

6. Make chocolate ganache. Spread ganache over cheesecake , refrigerate until set.

7. Remove cheesecake from the pan. Remove baking paper before cutting.


Chocolate Ganache

Stir ingredients in a small pan over low heatuntil smooth. Cool for 15 mins.

Wednesday, March 7, 2012

Mini Baked Cheese Cupcakes

If you see me baking during the weekdays, it is either that I am dying to try out a new recipe or something in my fridge is about to expire... :-p

So I was browsing through the website yesterday for a recipe using thicken cream, and these mini baked cheesecakes caught my attention...


Mini Baked Cheese Cupcakes


Ain't these little cheese cupcakes look yummy? They are so cute, and of course, easier, to eat, no mess.


Here is the cupcake cookie base.


And of course, here the baked cheese cupcakes.


These cheese cupcakes are pretty good, hubby and MiMi had ate 3 of them:-P

I took quite a few pictures as I thought they look pretty cool and yummy... It is best to be eaten warm as it is very soft & fluffy.

I had put them in the fridge the night before and when I took them out from the fridge, they are abit "hard", so either u have to thaw them a little or heat them up and they will taste as wonderful as they are straight from the oven:-D


I got the recipe from Exclusively Food:


Base150g Digestive biscuits

75g butter, melted (the amount you need may vary, depending on the type of biscuits you use)


Filling:

250g cream cheese, softened

75g (1/3 cup) caster sugar

1 large egg (we use eggs with a minimum weight of 59g)

20ml (1 tablespoon) lemon juice

100ml (5 tablespoons) thickened cream


Method:

1.Preheat oven to 180 degrees Celsius.

2.Line muffin pan (1/3 cup capacity holes) with patty/muffin cases.

3.Finely crush biscuits in a food processor or blender. If you are using a food processor, you can add the melted butter to the biscuit crumbs and process until well combined. If you are using a blender, it is probably easier to tip the biscuit crumbs into a bowl and then stir in the butter. © exclusivelyfood.com.auDivide biscuit mixture evenly among cases (about one firmly packed tablespoon of biscuit mixture per case). Firmly press mixture down with the back of a teaspoon until smooth. Set bases aside while making the filling.

4.Beat cream cheese and caster sugar in an electric mixer or food processor. Stop the machine a couple of times to scrape down the sides and base of the bowl. When the mixture is completely smooth and creamy, add egg and beat until combined.

5.Add lemon juice and cream and beat until well combined. Divide mixture evenly among cases.

6.Bake cheesecakes for 20 minutes. Remove from oven and allow to cool in pan for 30 minutes.

7.Remove cheesecakes from pan, place in an airtight container and refrigerate. Cheesecakes are ready to serve when they are cold and set. Remove cases before serving.

Cheesecakes can be stored in the refrigerator for up to three days. They are suitable to freeze. © www.exclusivelyfood.com.au

Thursday, November 17, 2011

Soft & Fluffy Japanese Cheesecake 2

Updated 23 Nov 2011 for the recipe


Boy, I just love Japanese Cheesecake.


I found this Japanese Cheesecake recipe from one of my baking book for a couple of weeks, but I had yet to try it till recently... No regrets for it! It is simply fantastic!!!


JAPANESE CHEESECAKE


This recipe, unlike from the first Japanese Cheesecake recipe from SSB, is much easier.

No mess No fuss & Easy!!!


Here is the baked cheesecake.

I used a 6" square tin to bake it.

Texture of the cheesecake....??? GREAT!!!! It is soft & moist, just like my first Japanese Cheesecake that I had tried.


Ingredients:

100g cream cheese, soften

60ml whipping cream

2 egg yolks

60g sugar

2 tbsp flour

1 1/2 tbsp cornstarch

1/4 tsp cream of tar tar

3 egg whites


Method:

1. Beat cream cheese until smooth. Add in whipping cream and mix well.

2. Add in 30g of the sugar portion and beat well. Add in the egg yolk one at a time, beat well after each addition.

3. Fold in the sieved flour and cornstarch. Mix well.

4. In another bowl, beat egg whites & cream of tar tar until foamy. Slowly pour in the remaining 30g sugar until stiff peaks.

5. Fold in 1/3 of the egg white merringue into the egg batter. Fold gently to mix well. Repeat with the remaining merringue.

6. Pour batter into a cake tin lined with baking paper.

7. Water-Bake the batter in a preheated oven of 180 degC for 20mins, bring down to 150 decC for 15mins. Leave the cheesecake in the oven for 10 mins to let it cool down slowly.